
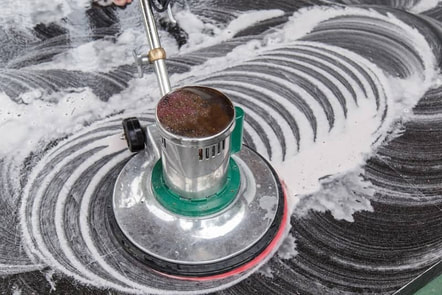
In today's post, we delve deep into the transformative world of the buffing technique for tile and grout cleaning - an approach renowned for breathing new life into your tile floors. Before you spray buffing or buff tile floors, it's essential to have the right equipment at your disposal, including a reliable buffing pad and a high-quality buffing machine to ensure a smooth and glossy finish. This guide aims to equip you with the information to restore gleam and remove scratches that come with foot traffic over time. Whether you decide to polish tile floors with a touch of elbow grease or opt for spray buffing or dry buffing with a machine, this technique promises an enviable sparkle that revitalizes the entire floor surface. Join us as we unveil the secrets behind choosing the right compound and the proper way to start buffing, ensuring safety and efficacy in achieving a surface free from marks and dirt. Let's usher in a new era of sparkling clean tiles today! Benefits of Buffed FloorsIn the world of home improvement, buffed technology has emerged as a revolutionary solution for revitalizing tile and grout. This remarkable process not only promises to renew luster but goes a step further to protect your surfaces from future wear and tear. Here's why adopting the buff technique for tile and grout cleaning should be on your radar. Glossy and Inviting FinishFirstly, let's discuss the undeniable allure of a lustrous finish. When you begin to spray buffing or dry buffing your tile floors, you are essentially removing the stubborn dirt and swirl marks that ordinary washing can't tackle. By utilizing the right equipment, like a buffing pad and machines, you are able to polish tile floors to a lustrous sheen that's sure to impress. This approach enhances the overall look of your surfaces, giving them a new lease on life. Ease of MaintenanceNext, this process is also a savior for those weary of elbow grease. With the aid of a buffing machine and the appropriate mixture, the physical effort required is significantly reduced. Moreover, this technique is adept at eliminating scratches that are commonly induced by foot traffic, thereby prolonging the life of your tiles. Safety and ProtectionSafety and protection are other prominent benefits to note. The buffing process creates a protective layer on the tile, safeguarding it from spills, stains from paint, and a wet floor. It's a proactive approach, ensuring the safety of your flooring from potential damages. Preparation and ExecutionWhen you decide to embark on this journey, remember to start buffing with a clean surface. This entails washing the entire floor with warm water and ensuring it is completely dry. Employing rotation during the buffing process is advised to achieve a smooth and even gloss. A Worthwhile InvestmentAdopting the buffing method in your maintenance routine is not just about achieving an enviable shine, but it's an investment in the longevity and durability of your tile and grout. So, when you are ready to transform your floor from drab to fab, grab your buffing pad and let the transformation begin. It's a surefire way to revitalize your floor, ensuring a sparkle that lasts! Understanding the Buffing Approach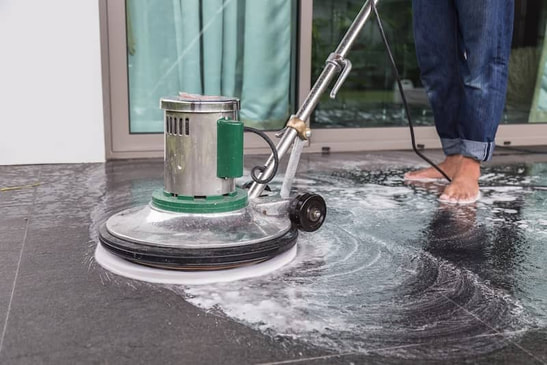 In the pursuit of maintaining pristine tile and grout, a proven method has evolved, touted for its effectiveness in not just cleaning but rejuvenating your floors - the buffing method. Before we delve into this transformative process, let's ground ourselves with the basic knowledge and necessary tools that form the cornerstone of this technique. Whether you are a homeowner aiming to bring back the gloss to your floors or a professional looking to refine your skills, this guide is designed to equip you with the right knowledge and techniques to excel in tile and grout cleaning. Definition and BasicsWhat is the Buffing? The buffing or polishing method is a meticulous process involving the removal of dirt and scratches from your tiles or floor, ultimately resulting in a polished surface that is not only pleasing to the eye but also creates a protective covering, safeguarding your floors from further wear and tear. This approach utilizes special buffing pads and machines to attain a smooth polishing finish that breathes new life and restore shine to your floors. Necessary Tools and Equipment To embark on this journey, one needs to be equipped with the correct equipment. Essential tools include a buffing machine, specific compounds for tiles, and appropriate buffing pads. Ensuring the use of suitable combinations and buff pads is vital to avoid any damage to the tiles' surface and ensure safety. Step-by-Step Guide to Buffed FloorsAs we venture further, let's initiate you into the actual steps that constitute this transformative technique, turning dull and lifeless floors into vibrant and glossy surfaces. Preparation Steps To commence, ensure the entire floor is clean and devoid of any dirt or debris. Using warm water and a clean cloth, wash the surface thoroughly and let it dry completely. This is an essential step before you begin buffing to ensure optimum results. Implementing the Buffing or Polishing Technique Step 1: Cleaning the Surface Using a clean cloth, remove any dust or dirt from the surface to prepare it for the buffing process. Step 2: Applying the Buffing Solution Next, apply the chosen buffing compound evenly across the surface, ensuring a thin, uniform layer to facilitate a smooth buff process. Step 3: Buffing Process Now, with the aid of the buffing machine, start to buff the surfaces in circular motions, slowly covering the entire area for an even polish. Step 4: Final Clean-up Post buffing, clean the surface with clean water to remove any residue, revealing a shiny, polished floor that not only looks new but offers an extra layer of protection against footsteps and spills. By adopting this approach, you not only restore the shine but also add a protective layer, ensuring a longer lifespan for your tiles. DIY vs. Professional Tile and Grout Cleaning Services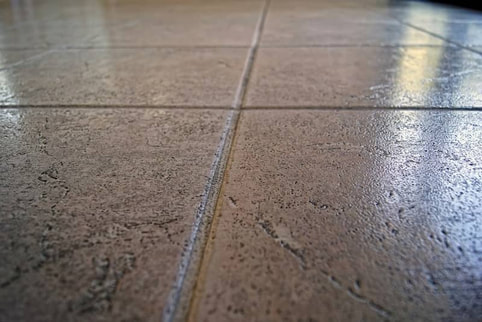 Embarking on a tile and grout rejuvenation project poses a significant question: Should you immerse yourself in a DIY project or entrust the job to professionals? Weighing the costs, pros, and cons of each option can guide you to an informed decision. Let's delve deeper into the intricacies of both paths. Cost ConsiderationsDIY Costs The allure of DIY tile and grout cleaning often stems from perceived cost-saving benefits. However, initial costs can quickly escalate with the necessary acquisition of the appropriate tools, like a buffing machine and buffing pad, not forgetting essential buffing compounds. Though labor costs are non-existent, hidden expenses can creep in, particularly with time investments and potential redo's due to errors. Professional Service Costs Opting for a professional service often comes with a heftier initial price tag. Yet, this investment grants you access to seasoned expertise, the assurance of quality materials, and efficient service that promises a job well done, potentially saving you money in the long run. Pros and ConsBenefits and Cons of DIY Pros: 1. Cost-Savings: A chance to save on labor costs exists substantially with DIY projects. 2. Personal Satisfaction: Completing the project yourself brings a sense of accomplishment and personal satisfaction. 3. Flexibility: DIY allows you to dictate your project schedule without relying on external timelines. Cons: 1. Time-Consuming: DIY projects can consume a significant chunk of your time, especially if you're learning as you go. 2. Potential for Mistakes: Without professional guidance, the chances of making errors, which might damage the tiles or grout, increase. 3. Safety Concerns: Handling machines and chemicals without prior experience can potentially lead to accidents. Advantages and Disadvantages of Hiring a Professional Pros: 1. Expertise: Professionals come equipped with extensive experience to conduct the buff job efficiently and correctly. 2. Time-Efficiency: Professionals can restore the shine to your tiles in a fraction of the time a DIY project might take. 3. Safety Assurance: Professionals possess the right equipment and knowledge, minimizing any risk of damage to your property. Cons: 1. Cost: The initial investment can be considerably higher compared to a DIY approach. 2. Availability: You might have to work around the professional's schedule, which could cause delays. 3. Lack of Personal Touch: Relying on professionals means relinquishing control and possibly not having the personal satisfaction that comes from doing it yourself. The choice between DIY and hiring a professional hinges on personal preferences, budget considerations, and the desire for quality results. Whether you decide to venture into the DIY world, driven by elbow grease and ambition, or choose to hire seasoned professionals, the ultimate goal remains the same: a shining, pristine tile and grout surface that breathes life into your space. Look for a Reliable Local Tile and Grout Cleaning ContractorEmbarking on the journey of revitalizing your tile and grout can be truly transformative, as we've explored the intricacies of the polishing method. Post-buffing, remember to maintain the pristine condition by routine cleaning and avoiding harsh chemicals that can dull the shine.
At this juncture, I'd like to emphasize that you don't have to venture alone. For assistance or expert services, reach out to the proficient team at Orlando Tile and Grout Cleaners, who stand ready to assist you in maintaining the elegance and shine of your newly buffed floor tiles with utmost professionalism and skill. Comments are closed.
|